Hello everybody, I hope you are having an incredible day today. Today, I will show you a way to make a distinctive dish, yogurt brined fried chicken (& general fried chicken how-to). It is one of my favorites food recipes. This time, I’m gonna make it a little bit unique. This will be really delicious.
Once you've brined fried chicken, you'll never cook it any other way. Brining is an easy way to ensure your chicken is juicy and has tons of flavor. I've even marinated it in curry yogurt.
Yogurt Brined Fried Chicken (& General Fried Chicken How-To) is one of the most well liked of recent trending foods in the world. It’s enjoyed by millions daily. It is simple, it is fast, it tastes delicious. They’re fine and they look fantastic. Yogurt Brined Fried Chicken (& General Fried Chicken How-To) is something that I’ve loved my whole life.
To begin with this recipe, we have to prepare a few ingredients. You can cook yogurt brined fried chicken (& general fried chicken how-to) using 25 ingredients and 11 steps. Here is how you can achieve that.
The ingredients needed to make Yogurt Brined Fried Chicken (& General Fried Chicken How-To):
- Prepare 3.5-4 lbs. bone-in, skin-on chicken pieces. Large whole breasts should be quartered (and also not mistaken for half breasts ;)
- Get For the brine:
- Get 1/2 cup yogurt
- Get 3-3.5 teaspoons kosher salt
- Get 2 teaspoons dried thyme
- Make ready 2 teaspoons dried sage
- Get 2 teaspoons onion powder
- Take 2 teaspoons paprika
- Take 1.5 teaspoons garlic powder (not garlic salt)
- Make ready 1.5 teaspoons sugar
- Make ready 1/2 teaspoon black pepper
- Make ready For the dredge:
- Get 2 cups flour
- Take 1/2 cup corn starch
- Make ready 2.5 teaspoons salt
- Get 2 teaspoons sugar
- Take 2 teaspoons dried thyme
- Take 2 teaspoons dried sage
- Get 2 teaspoons onion powder
- Take 2 teaspoons paprika
- Make ready 1.5 teaspoons garlic powder (not garlic salt)
- Prepare 1/2 teaspoon black pepper
- Make ready Other:
- Get vegetable or peanut oil for frying
- Get tongs for turning chicken safely
In comparison to a hardworking brine, marinades seems like a hard sell when it comes to flavoring and tenderizing meat and poultry. The secret to this juicy chicken is the yogurt in the marinade, which keeps the meat moist even if it gets a little overcooked. This easy, fresh-tasting yogurt marinade helps the chicken stay juicy even if it's a little overcooked. The marinade also works well with skin-on boneless breasts or thighs.
Instructions to make Yogurt Brined Fried Chicken (& General Fried Chicken How-To):
- Mix all brine ingredients in a large bowl and stir or whisk until all the salt and sugar have been dissolved.
- In a large mixing bowl, combine the chicken with yogurt brine and gently toss and massage everything together until the brine is evenly distributed throughout. It's a good idea to check each individual piece of chicken to ensure it's been thoroughly coated.
- Refrigerate the chicken and let it brine/marinate for at least 2 hours and up to 24 hours.
- 45 minutes before frying, take the chicken out of the fridge and let it come up in temperature. While it's doing that, prepare the dredge by combining all dredge ingredients in a large mixing bowl or casserole dish and stirring or whisking several times to evenly distribute all the seasonings.
- 10 to 15 minutes before frying, fill your large pot or pan (I like to use my wok, but you can use a Dutch or French oven, or a deep-ish cast iron skillet) to about 2/3 capacity with frying oil and preheat the oil over medium high heat to 350F to 365F. If you don't have a thermometer, you'll know the oil is ready for frying as soon as a good pinch of flour dropped in sizzles gently but immediately.
- Line a sheet pan or large platter with a brown paper bag or a double layer of paper towels and set it on the counter next to the stove.
- Working in batches of 3 to 4 pieces, coat the chicken completely with the dredge, shake off the excess, and gently slide the chicken into your oil. And again, if that flour doesn't begin to gently and immediately sizzle upon hitting that oil, resist the urge to let it fry anyway, and let the oil come up in temp before you put the chicken in.
- I like to put similarly sized/same type pieces in together, largest ones first. That way, a) each batch finishes cooking at roughly the same time and b) the larger pieces that have been fried first will retain heat longer while the smaller pieces are finishing up.
- Generally speaking, I find that thighs take longest - 15 to 18 minutes total, 7.5 to 9 minutes per side, and drums, whole wings, and breast pieces take 12 to 15 minutes total, 6 to 7.5 minutes per side. Don't forget to flip midway! :)
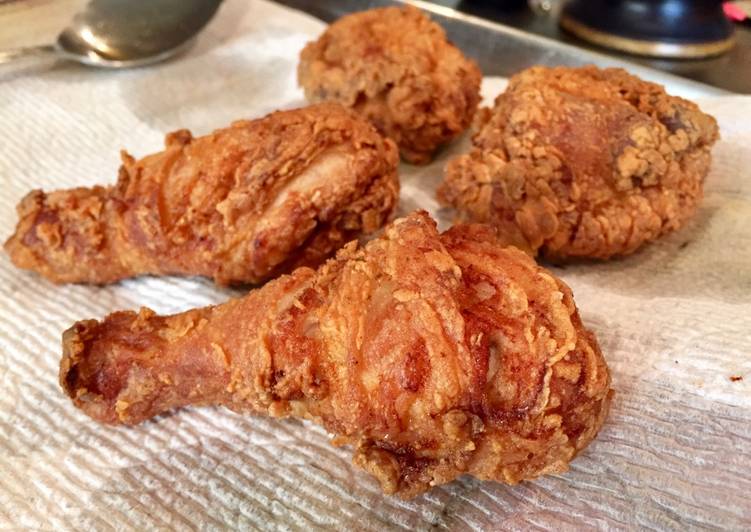
- When it's time to take the chicken out, using your tongs, gently shake off excess oil, and set it on your lined sheet pan or platter. And that's it! Looks like a lot, but it's pretty simple. The yogurt really does help to make moist, tender, flavorful fried chicken. :)
- Enjoy! :)
Place chicken in a large bowl and add half of kimchi yogurt; turn to coat. Working in batches, add fried chicken and turn to coat, then carefully add chicken to skillet and fry, turning often to prevent it from sticking, until golden brown and instant-read thermometer inserted into. Yogurt Fried Chicken - This recipe for yogurt fried chicken adds a fresh twist on an American classic. The meal is made from chicken legs This yogurt-infused recipe for crispy chicken is a healthier take on the classic American meal and replaces butter and heavy cream with plain and unflavored yogurt. Remove chicken from brining liquid and pat dry.
So that’s going to wrap this up with this special food yogurt brined fried chicken (& general fried chicken how-to) recipe. Thank you very much for your time. I am confident that you can make this at home. There is gonna be interesting food in home recipes coming up. Don’t forget to save this page in your browser, and share it to your loved ones, colleague and friends. Thank you for reading. Go on get cooking!